Blog Archives

Top Tools for Music Artists to Design your Cover Art on Your Own

Mar 10, 2023 by Malek - 0 Comments

As a music artist, designing your new song or album cover art is an essential part of branding and promotion. You want to make sure that your album or song cover art is visually appealing and accurately represents the style and genre of your music. In the past, designing album or song cover art required the help of professional graphic designers, but with the advancement of technology, there are now many tools available for music artists to use on their own. In this blog post, we’ll explore some of the best tools for music artists to use for designing their new song or album cover art, including Canva, Adobe Express, and PicsArt.

Canva

Canva is an easy-to-use online design tool that offers a wide range of design templates for music artists to choose from. I’ve personally been using Canva for the last 5+ years for most of my graphic design. The image at the very top of this blog was designed in Canva! With Canva, you can easily customize the design templates to fit your brand and style. Canva has a drag-and-drop interface that makes it easy to add images, text, and other design elements to your album or song cover art. You can also upload your own images and use them in your designs. Canva offers both free and paid plans, with the paid plans offering more design features and templates.


Adobe Express

Adobe Express is a mobile app that music artists can use to create their album or song cover art. With Adobe Express, you can choose from a variety of design templates or create your own from scratch. Adobe Express offers a user-friendly interface that allows you to easily add text, images, and other design elements to your album or song cover art. You can also upload your own images and use them in your designs. Adobe Express offers both free and paid plans, with the paid plans offering more design features and templates.

PicsArt

PicsArt is a mobile app that music artists can use to create their album or song cover art. With PicsArt, you can choose from a variety of design templates or create your own from scratch. PicsArt offers a user-friendly interface that allows you to easily add text, images, and other design elements to your album or song cover art. PicsArt also offers a wide range of filters and effects that you can use to enhance your designs. PicsArt offers both free and paid plans, with the paid plans offering more design features and templates.

Designing your new song or album cover art doesn’t have to be a daunting task. With the tools we’ve discussed in this blog post, music artists can easily create visually appealing and effective album or song cover art that accurately represents their brand and style. Whether you choose to use Canva, Adobe Express, or PicsArt, each tool offers unique features and templates that can help you create a design that stands out. So go ahead and give these tools a try, and see how easy it is to create amazing album or song cover art on your own.

How to Set Music Goals for 2023

Jan 05, 2023 by Malek - 0 Comments

It’s a new year and that means it’s time for new music goals! Whether you’re an aspiring singer, songwriter, or rapper, setting goals is an essential part of furthering your career in music. But what are some good goals to set? And how can you make sure you achieve them? Here are a few tips to get you started.

Set Achievable Goals

When setting your goals, it’s important to be realistic. There’s no point in setting a goal that’s impossible to achieve. Not only will you be setting yourself up for disappointment, but you’ll also be demotivating yourself. So instead of aiming for something that’s out of reach, set achievable goals that you know you can reach if you put in the work.

Make A Plan

Once you’ve set your goals, it’s time to make a plan on how to achieve them. This step is crucial because it gives you a roadmap to follow and keeps you accountable. Without a plan, it’s all too easy to get sidetracked or give up entirely. So take the time to sit down and map out how you’re going to achieve your goals. What steps do you need to take? What resources do you need? Who can help you along the way? Answering these questions will help keep you on track.

Measure Your Progress

Measuring your progress is key to staying motivated and on track. When you can see how far you’ve come, it’ll be easier to stay focused on your goal and pushing forward. Plus, it’ll give you a sense of accomplishment every time you reach a milestone. There are various ways to measure your progress, so find what works best for you and documentation is always important when pursuing anything creative. 

For example, if your goal is to write 10 songs this year, keep track of how many songs you write each month. Or if your goal is to land 10 gigs this year, keep track of the gigs you book each month. Seeing your progress in black and white will not only help keep you motivated; it’ll also help push you to exceed your original goal. 

And speaking of exceeding your original goal… 

Don’t Be Afraid To Dream Bigger 

Aspirations are meant to be challenged. Once you reach one goal, don’t be afraid to set another one that’s even bigger and better. After all, what’s the fun in achieving something if there’s nothing left to strive for? So keep pushing yourself—you may just surprise yourself with what you’re capable of achieving.


Setting music goals might seem daunting at first, but by following these simple steps—setting achievable goals, making a plan, measuring your progress, and dreaming big – you’ll be well on your way towards a successful 2023! Best of luck and please keep me posted on how things are going on achieving your musical goals this year.

Audio Sampling with Logic Pro’s EXS24

Dec 03, 2014 by Malek - 0 Comments

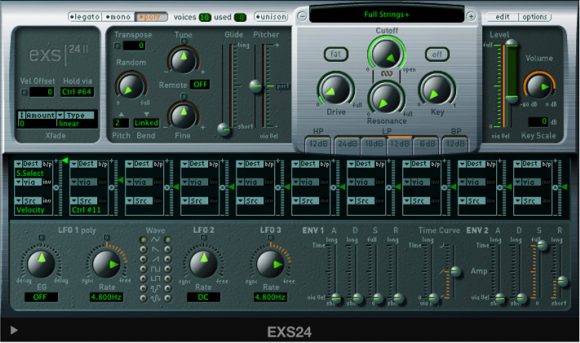
Sampling is at the heart of hip-hop music’s origin. It is also one of the cornerstones of how much of today’s chart-topping music is created. In the video below I show how I make a sound that I assign across an entire MIDI keyboard from a sampled audio file using Logic Pro‘s EXS24 Sampler.

Please leave any questions that you may want me to answer in an upcoming episode in the comment box below.

Audio Mastering In 6 Easy Steps

Nov 06, 2013 by Malek - 2 Comments

Mastering is the final step before a song or album is considered finished. There are audio engineers that specialize and dedicate their entire careers to the art of mastering. Audio mastering optimizes sound playback on all playback systems by applying corrective equalization and dynamic enhancement. I am in no way a mastering master, but wanted to provide some techniques that I use.

1) A clean mix. Before even thinking about mastering a song, the mix should be finalized. This means eq’ing, compressing and adding all the final touches to the track to have it sound the way it should. It is also important to make sure that the mix doesn’t peak and leaves room for the mastering to work its magic.

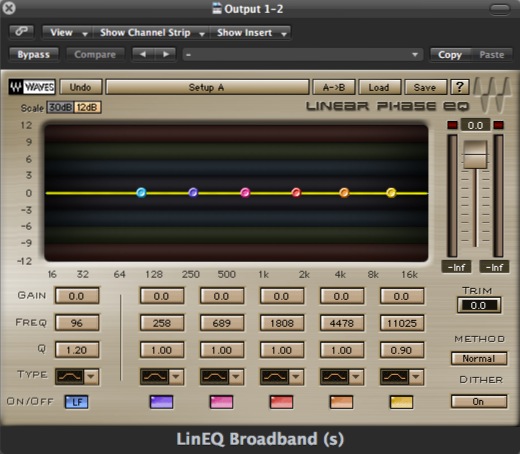
2) Master EQ. Once the mixing is done, bring the single bounced WAV track of the song into a new session – the “mastering session.” On the master channel, the first plugin on the “master chain” should be an equalizer. I prefer using Waves’ Linear Phase Eq Broadband. However, the stock Logic or Pro Tools equalizers work great too.

waves-lineq-broadbandMake only minor changes to the eq at this stage. Most of the noticeable eq’ing issues should have been worked out during the mixing stage. Depending on what the track needs, I lightly boost the bass (between the 64-128 range) and high frequencies (between the 4k and 8k range) to brighten up the track and give it a little more body.

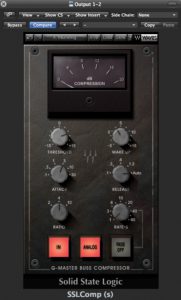
3) Compression. The second plugin in my master chain is a compressor. A compressor acts as the glue that brings the track together and evens out both odd frequencies and levels in the mix. Waves provides some great preset options to start off with. I usually load up the “Mastering” preset and adjust from there. I would recommend keeping the release at automatic, and keep the ratio low. The volume will change as you turn the threshold. Don’t turn the threshold up too high because it will max out the track volume leaving no room for the rest of the plugins in the master chain to perform their duties. The “industry standard” volume will be achieved with a different plugin, so don’t fret.

waves-sslcomp

Tip: If you are going for a very clean mix, I would recommend turning off the “Analog” button on all the plugins, both during the mix and mastering, to remove the very faint hissing sound. Most of the time the hissing isn’t noticeable, but I always seem to notice it right when the track ends before fading out.

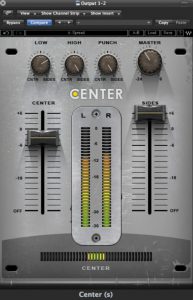
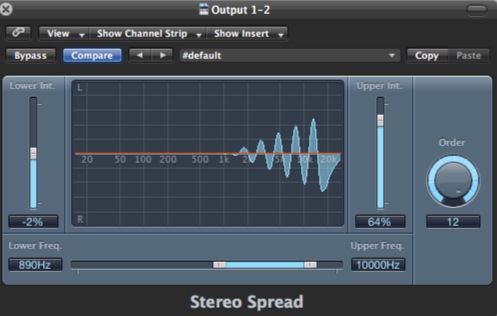
4) Stereo Imaging. This technique makes the overall mix wider, giving the track more body. However, apply stereo imaging with care because a very wide master can lead to phasing issues. Phasing will make the track unenjoyable to listen to, which is exactly the opposite of what we want. I prefer either using Waves’ Center or Logic’s Stereo Spread. Although Center doesn’t provide much control over frequencies, it does a great job.

waves-centerLogic’s Stereo Spread is also great. The image below shows a recommended setting for how I usually use it in a master channel. Avoid spreading any frequencies below 100Hz because bass frequencies don’t carry any directional information and have more of an impact in mono than in stereo.

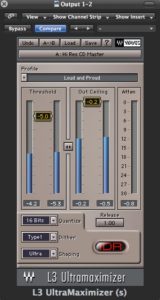
stereospreadlogic5) Maximizer. A maximizer is used to bring the song’s volume to “industry” level. It depends on the song, but I prefer using Waves’ L3 Ultramaximizer. This plugin does a great job boosting volume levels without making the track sound muddy or distorted.

waves-l3ultramaximizerThe “Hi Res CD Master” preset is pretty good. I usually use it but then adjust the threshold accordingly. Moving the threshold down will bring the overall volume level up. I usually leave the ceiling at -0.2 and just focus on the threshold level.

6) Fade Out. The final step is to make sure that the track fades to black and ends at the desired time. A lot of the time it is recommended to leave a “tail” at the end of the song when exporting the mix. This allows for the end time to be decided while mastering. You don’t want the end to be too abrupt or too long.

This is what the master channel should look like.

logic-masteringchannelThese techniques can be applied to a single song or to an entire album. If using these techniques for an album, it is integral to put each song on separate audio channels to provide more control over volume and equalization. The goal when mastering an album is making sure the volume levels are consistent and that each song flows nicely into the next.

I offer mixing and mastering services, so please feel free to contact me if you are interested. I hope this short tutorial helps and good luck!